April 2018 NewsBlast | Article 2
16 Apr 2018 / joeUplift Yourself in Upward Facing Dog
1 Yoga Pose to Approach with Caution
By Tammy LeBoss | thefitprofoodie.com
 Copyright: fizkes / 123RF Stock Photo
1 Yoga Pose to Approach with Caution
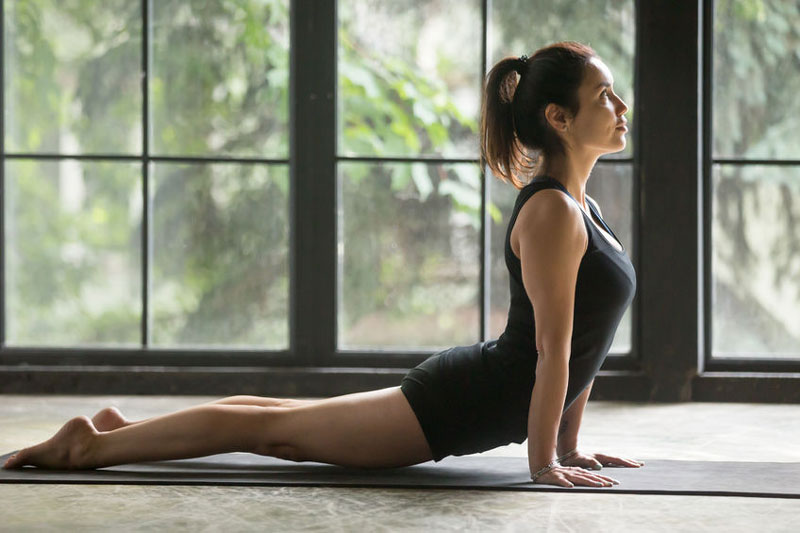
Upward Facing Dog is a backbend that offers many benefits. Doing this consistently can improve posture, aligns the spine, stretches the chest, shoulders, abs and hip flexors. When applied properly, this yoga pose can be physically and mentally uplifting. This pose is a great healthy back exercise for which most students will need clarification. It is not always clear when to ‘squeeze this’ or to ‘let go of that’ especially when yoga offers so many areas to focus on. For this move, instructors must cue students to let go of their glutes. The reason for this has to do with allowing the SI joint (sacroiliac joint) to articulate during this movement. This is a very important point that many instructors over-look.
The sacroiliac joint is where the sacrum forms joints with the top of the pelvis. These joints are the main junctions where the weight of the entire upper body transfers down to the legs and serves as an attachment place for many ligaments and tendons. Comprised of four vertebrae that are fused together, the sacrum is important as it supports the entire spine as its ‘home’ base structure. It has also been referred to by doctors as the ‘sacred bone’ supported by ligaments, not muscles. It is interesting to know that this joint is intelligently designed to articulate, but it’s also supposed to be stable. Learn more about this crucial joint and more in NAFC Yoga200™ Interactive course, and get your students safely and effectively into poses using yoga principles of alignment.
Pro Tip: When explaining any pose, aim for few words and fewer metaphors.
Here’s a simple way you can apply ‘keeping it simple’ using NAFC ANSER™:
- A- (Align joint) center of heel in line with 2nd toe
- N- (Neutral spine) neutral pelvis
- S- (Square hips) Feet hips-width apart
- E- (Engage) Contract quadriceps, release glutes
- R- (Retract) draw shoulders back and down
Challenge your cuing skills. Try ‘blind cuing’ by closing your eyes, and using 20 words or less (like the above example) per exercise. Teach your students how to feel their movements, as opposed to thinking about them. Good luck and be sure to let us know how you’ve succeeded in getting others out of their head into their bodies!
Written by: Tammy LeBoss, The FitPro Foodie
March 2018 NewsBlast | Article 1
15 Mar 2018 / joeNAFC NewsBlast - March 2018 | Ed 1
Hips & Twists - How to Safely Twist, Part 2
Written by: Tammy LeBoss - FitPro Foodie

Copyright: Aleksandr Davydov / 123RF Stock Photo
How to Twist
Indian practitioners of yoga typically squatted and sat cross-legged in daily life, and yoga poses were an outgrowth of these postures. Now modern-day yoga practitioners sit in chairs all day and rush into studios a couple of times a week. They strain to twist themselves into more difficult postures despite their lack of flexibility and other physical challenges.
Twists can help slumped-back postures and provide an abundance of benefits. Twisting poses can help restore our spine’s natural range-of-motion, cleanse our organs, aid digestion and stimulate circulation. Twists also provide structural benefits to the musculoskeletal system, and improves focus and awareness.
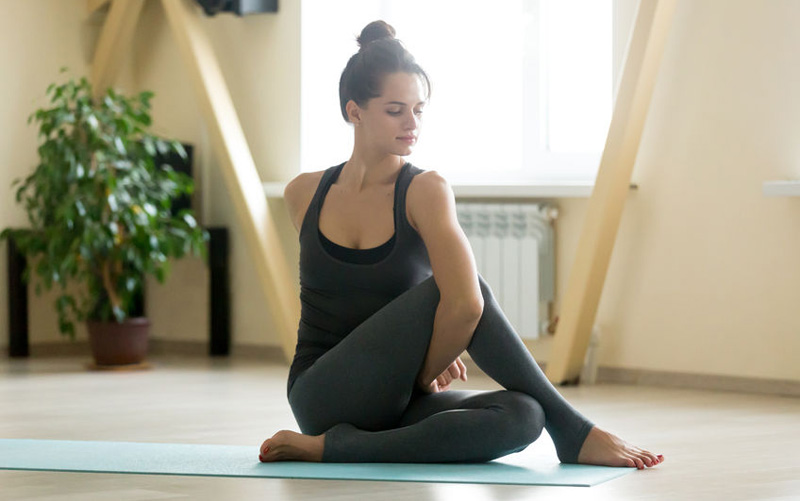
But, before plunging your students into deep twists, keep in mind these key anatomical points in a basic Seated Twist:
Elongate the spine; a slumped-over posture significantly limits spinal rotation. Ground your sitting bones and draw the spine straight up the crown of the head.
Make sure that your spine is perpendicular to the seat, avoid listing to the side, front nor back.
Remember that each section of the spine has a different rotational mobility. The cervical (neck) vertebrae, for example, are the most mobile in twisting.
Because the 12 thoracic (mid-back) vertebrae have ribs attached, they can’t twist as freely as the neck vertebrae.
And because of the orientation of the lumbar (lower spine) facet joints, the rotation of these five vertebrae is the most limited.
Pro-Tip
To ensure that you don’t over twist in the more mobile parts of your spine, begin your seated twist by bringing your awareness into your lower back and beginning the twist from there. Allow the twist to gradually unfold and never force a twist to occur.
Twists should be entered and exited methodically with care and caution. Very flexible participants may tend to “throw” themselves into deep twists, exposing them to greater risk of injury. On the contrary, stiffer participants may try to force themselves into a deep twist that they are not yet ready for. All twists tend to collapse the ribcage to some degree. This is because the thoracic spine has a limited capacity to rotate, being bound by the ribs. Use the accessory muscles of respiration to counteract the tendency. Begin by drawing the shoulder blades toward the midline and stabilizing them there. Then expand the chest by engaging the pectoralis minor and serratus anterior muscles.
Pro-Tip
For optimal safety, all twists should be accessed from a neutrally rotated posture. Prepare for deep twists with a neutralizing pose such as a Sphinx pose, and Standing and Seated Forward Folds where the spine is in a symmetrical shape.
Here are a few more key points to remember when transitioning into twisting:
- Square the hips which should not revolve with the torso and upper body (NAFC ANSER™)
- Avoid leading with the head
- Keep the cervical and thoracic spine in line
- Never hold your breath while twisting
- Keep eyes in line with the direction of twist
Challenge Your Balance with a Standing Twist
Once the basics of alignment are realized, challenge your balance slowly with control with Revolved Half Moon pose. Apply the following:
- Engage a solid grounding leg that is the same in Mountain pose
- Keep the grounding leg straight yet unlocked
- Direct the tailbone toward the lifted heel
- Lift the sternum and draw the front ribs inward
Learn to fully reap the physiological and structural benefits of twists, and you might also gain its centering benefits. Learn more about how the layers of muscle and bone revolve on a deeper level, and gain the ability to stay centered as the world jiggles around you. Learn more about how to safely and effectively enter and exit deep twists such as Revolved Triangle, Crescent Lunge, Chair, Crow poses and more. Always apply safe sequencing and be prepared to offer modifications as every ‘body’ is different.
Written by: Tammy LeBoss - FitPro Foodie
September 2017 NewsBlast | Article 2
20 Sep 2017 / NAFCNAFC NewsBlast - August 2017 | Ed 2
The Best Way to Safely Transition in Yoga
Written by: Tammy LeBoss, The FitPro Foodie
Sources: NAFC Yoga200™ Interactive Manual, The New York Times, and Yoga Alliance.
 Copyright: dimol / 123RF Stock Photo
Avoid This Common Mistake
Did you know that September is National Yoga Month? Help us to celebrate this event by spreading the word about NAFC Yoga200™’s mission: Make yoga accessible for all. One way to do this involves removing the frills and bringing people back to what’s really the science of yoga.
The ancient practice of yoga has been misunderstood and misinterpreted by many. The practice of yoga has grown rapidly in the United States and popularity is growing exponentially. A recent study conducted in 2016 by Ipsos Public Affairs on behalf of Yoga Journal, reports an estimated 36.7 million Americans are participating in yoga. This number is a dramatic increase from 20.4 million in 2012. While some ‘gurus’ have touted its wide-ranging benefits, other teachers and health professionals have raised more interesting questions. These questions have to do with increased reports of injury, nerve damage and even stroke. Wonder why? You may learn more in this New York Times article, published in 2012: Article Link
To continue the conversation, we want to highlight the safety and efficacy of yoga. This month, look for more on how to build on safe transitions, the best ways to twist safely, and as a bonus-a quick list of yoga poses to approach with extreme caution when dealing with the general population.
According to NAFC Yoga200™
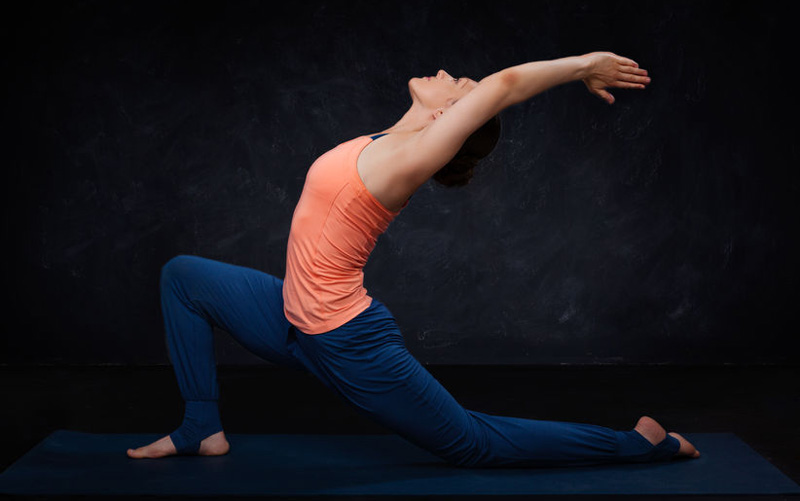
“Transitions are one of the most common places for injuries to occur, and as such these should be mindfully crafted throughout the full flow of the class. Pose transitions should almost always be taught within the same category of poses with a few exceptions. For example, a transition from Warrior 2 to Triangle pose is safe because the foot positioning and foundation for the poses are the same. Another example involves using a neutrally rotated standing pose to Crescent Twist because they have the same foundation.”
When teaching a balancing pose, it is acceptable to transition from an externally rotated standing pose to a neutrally rotated standing pose as long as the leg and hip in transition are non-weight-bearing. For example, moving from tree pose to warrior 3 is safe, as the standing leg does not change positions. But, moving from Warrior 3 to Half Moon pose, for example, is unsafe, as it puts too much strain on the standing hip and SI joint.
Pro Tips: Avoid transitioning from an externally rotated standing pose to a neutrally rotated standing/balance pose or twist.
Transitioning from Warrior 1 to 2 is another common transition where mistakes are likely to happen. Transitioning from Warrior 1 to Warrior 2 may be taught if the transition is safely instructed with attention to the safety of the front knee and position of the feet. (See NAFC blog post The Way of the Warrior to learn more). Be sure to also check out How to Bend Safely and Effectively by applying gentle transitional poses. Always remember to approach and exit transitions with ‘slow and controlled’ and avoid ‘fast and furious’ movements.
This month, help us to make that change. Make yoga for every ‘body’. The data is there showing us that yoga is flourishing in America. And, so is the demand for well-qualified instructors. To keep up in a thriving yoga industry, yoga teachers must possess a warm and friendly personality, use clear instruction, and be able to express a certain level of knowledgeable, helpfulness and approachability. Apply these skills with a solid understanding of the science of yoga, and you’ve got a winning formula for making yoga accessible for all.
Written by: Tammy LeBoss, The FitPro Foodie
1 2 3

